Make Your Own Shrieker Mushrooms
Make Your Own Shrieker Mushrooms
|
Administrator
|
This post was updated on .
So, last week I posted some pictures of my first home made Shrieker Mushroom, which proved quite popular among the 2D3+1 people who actually read all this stuff I write - so here for those who'd like to have a go at it themselves, is a rough step by step(ish) guide to how I made/make my Shrieker Mushroom(s)
Tools and Materials You will need the following bits and bobs to make your Shrieker Mushrooms ... 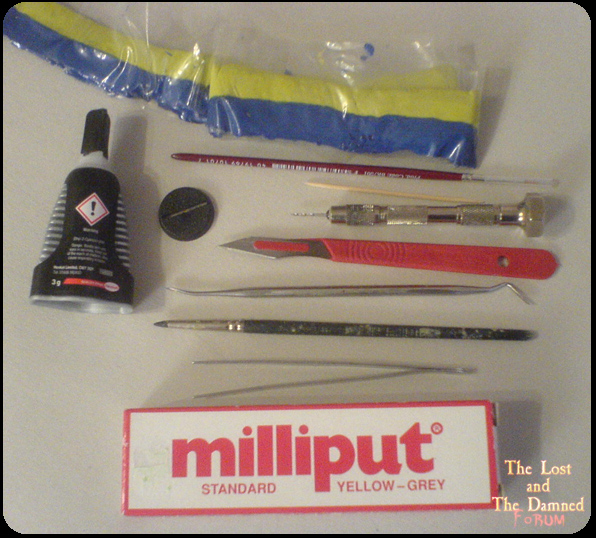 Green Stuff (also known as Kneadatite) Super Glue A Paint Brush with a thin handle (seriously the handle is the important bit) A base At least 2 Cocktail Sticks or Tooth Picks (is there even a difference?) A Pin-vice Drill A old blunt Craft Knife, Scalpel, Hobby-Knife or what have you Some kind of Sculpting Tool (as similar as possible to the one in the picture will be useful) A Rubber-Tipped Sculpting Tool (optional and expensive, but useful) Thin-Ended Tweezers Milliput (optional) Patience (not pictured, but yes you'll need some as the Green Stuff and Milliput needs to be left to set between steps) A few notes before we start First of all I'd like to say that I'm not a brilliant sculptor my any means (in fact if I need anything complicated sculpted these days I tend to Ask/Beg/Bribe/Threaten Messy to do it for me) so if I can make these with a little practice, anyone reading this probably can, so I heartily encourage you all to have a go, yes YOU (like you might read on the back of a FF novel) can do this too, I've called this article 'Make Your Own Shrieker Mushrooms' for a reason  Secondly I'm sure some of you have looked at the Tools and Materials picture above and thought “Holy crap, that's a lot of Green Stuff!” - don't worry you don't need that much Green Stuff, but I've shown you a long strip of it so I could make a point; Green Stuff is not expensive - shop around, check eBay and don't buy those tiny packs that Army Painter, GW and others sell in your local hobby store (this is the one and only time I'll tell you not to use your local hobby store!) you'll save yourself a lot of money, it can be cheaper than Fymo and the like (which people often advise me to use instead of Green Stuff because of cost) if you know where to look. Seriously the most expensive thing in that picture above is probably the Rubber-Tipped Sculpting Tool (or possibly the Pin Drill)  Get on with it! Now lets begin - you'll notice I've edited all the step by step pictures into an unusual circular format so you can pretend you're looking at them though a telescope or microscope … or perhaps some kind of magical scrying orb Step 1: an excellent place to start Grab the clippers I failed to mention in the Tools and Material list and cut a cocktail stick in half (we're starting out easy here)  this will form the core of your Shrieker Mushroom around which all the parts will be sculpted Step 2: the Cap and Gills Mix up a small amount of Milliput and form it into a ball shape slightly smaller than you want the Cap of your Shrieker Mushroom to be. Flatten it a little to get the mushroom cap shape (or you may want to skip flattening it - see later) and then use a blunt knife to press lines into the bottom radiating across the middle, do as many as possible - this will form the gills of your Shrieker Mushroom. Finally push the blunt end of your bisected cocktail stick into the point where all the lines cross and leave the Milliput to harden.  Please note you don't have to use Milliput for this stage but I did, so that's what I'm showing you here. Step 3: detailing the Cap Mix up some Green Stuff, flatten it out and then use this to make a thin layer (no more than 1mm thick) over the top of the Cap, leaving the Gills exposed. At this stage you can use a Rubber-Tipped sculpting tool to add some texture to the cap (and cover any fingerprints) by lightly dabbing the greenstuff in a random pattern. Then take a sculpting tool with a thin end and press some short lines into the Green Stuff in a rough pattern of interlocking uneven pentagons and other shapes to make the Scales. To finish up this stage take your tweezers and pinch the Green Stuff all around the edge where it meets the Gills to form the Margin. I recommend making sure your tweezers are slightly wet when doing this so that you don't pull the green stuff away from the cap and ruin your work.  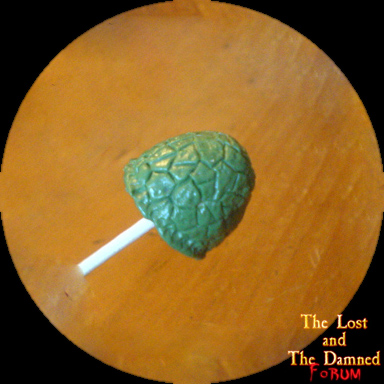 Now leave the Green Stuff to set before going onto the next stage Step 4: the Holes To make the Holes first take some Green Stuff and make it in to little balls about 2mm or less across, now press them flat onto the Cap to form little discs - try to place them randomly and roughly evenly spaced for best effect (you can also use them to cover up any mistake you might have made in the last step). Next take your blunt knife and press some radiating lines into each little disc in a similar way to how you made the Gills in Step 2 Using the handle of a thin paint brush or something similar press firmly in the centre of each little disc.  again leave the Green Stuff to set before the next step Step 5: the Stem Mix up yet more Green Stuff and wrap it around the exposed cocktail stick to form the Stem. Use another cocktail stick to add texture to the Stem by pressing into the Green Stuff at an angle and dragging slightly up or down the Stem. Do this over and over and close together for full effect. To add the Ring (some times called the Annulus) pinch out the Green Stuff with your tweezers around the middle of the stem about half way up.  as before leave the Green Stuff to harden Step 6: the Base Take a base and prepare it in whatever manner you see fit (if at all). I've glued on some chunks of textured plastic that roughly match my dungeon floor. Now drill a hole in the base the same size as the cocktail stick - make it near but not exactly in the centre, the reason for this being your Shrieker Mushroom will probably not be symmetrical and in fact it will look better if it isn't symmetrical, but you'll want it to fit evenly on the base. 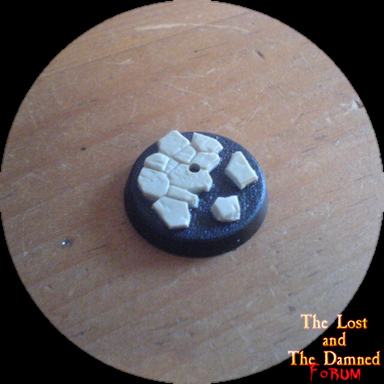 Now put a little bit of Super Glue on the bottom of the Stem where it meets the exposed cocktail stick and push the cocktail stick though the hole in the base. When the glue is dry clip the end of the cocktail stick off from under the base 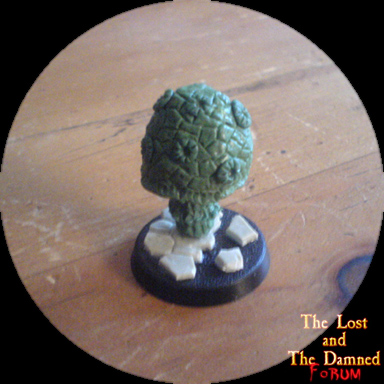 Since there was no green stuff involved in this step you can move strait onto Step 7 (which does involves Green Stuff) Step 7: almost done now Finally we come to adding the root-like Mycelium, you'll be please to know this is the final step. Roll some Green Stuff into little 'sausages' and stick one end of them to the Stem just below the Ring and trail the other end out over the base (try and get a few kinks into them for best effect). 6 or 7 of these should look good depending on how thick you've made your stem. Leave the Green Stuff to harden a little, but not completely before taking your blunt knife and scratching some lines into the Mycelium along their length.  Now leave the Green Stuff to harden completely and your done!  Experimentation and future plans The Shrieker Mushroom I took pictures of me sculpting is my 2nd attempt and since then I have been working on 2 more. I suggest you (like I have) experiment with different proportions and sizes of Stem, Cap and Holes (look in your D&D manuals for inspiration, different artists have had different interpretations of what Shrieker Mushroom should look like down the years) 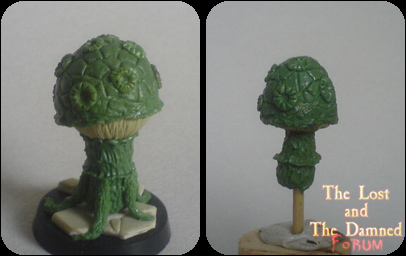 ^ for my 3rd attempt I used a more rounded shape for the cap (I didn't flatten it before adding the gills) and I think it's probably the best one so far. My 4th attempt I've made slightly smaller but is otherwise unremarkable. 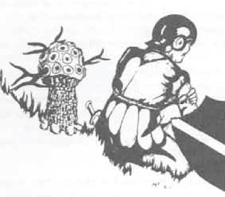 ^ I have plans that the next one of these I make will be a Violet Fungi to which I will add branch-like tentacles, probably using cut up bits of Woodland Scenic's plastic trees An Educational Bit I like to learn new things when I can and I hope everyone reading this does too. Throughout this post I've (when possible) used terms that are used to describe the parts of real-life mushrooms. I recommend at least having a quick read of Wikipedia's page on Mushrooms 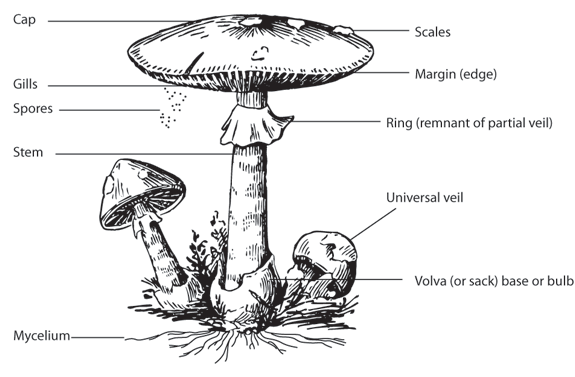 ^ It's just possible someone else other than me might find this interesting too As I read up on mushrooms and fungus a little, it struck me that things like Shrieker Mushrooms and Violet Fungi might be possible in nature - then I came across this picture on Google images ... 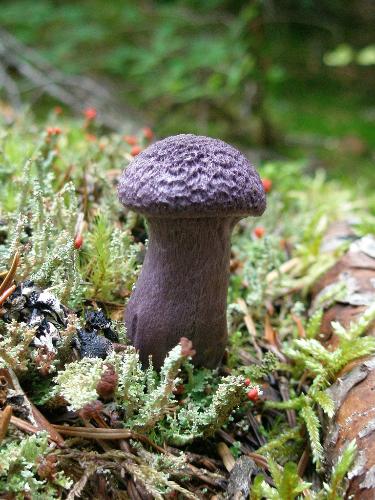 ^ I have no idea what species this really is, but by the Gods Greyhawk does it look familiar! I've shown you mine, now show me yours! Well that's the end of my post for now, but I hope a few of you will have a go at making some Shrieker Mushrooms for yourself - and if you do I'd like to see how yours come out - So please post pictures of your own Shrieker Mushrooms 
-----------------------------------
~The ravings of a single mad Goblin is bad enough, but such a power-hungry, malice-filled creature as Mortis can never hope to be understood~ |
|
Great tutorial again! It looks so easy :P but I don't have the courage to sculpt anything yet myself.
Eager HeroQuest newbie since july 2011 :D
Check my Custom EU format card sets! Ye Olde Inn | HeroQuest blog with lots of usefull stuff |
|
Administrator
|
It just takes a bit of patience. You don't even need to make too much effort with the hard bit (the scales)
If you buy a bag of oranges from a super market (the kind with the plastic webbing) you can just use that bag to make the scales. Wrap it over the top of the mushroom when you've applied a thin GS layer over the top and really gently squeeze/ squish it around a bit. Little practice and you'll have an easy job! The rest is easy as anything, just make sure you have a big lump of blu-tac/ play-doh or something soft, squishy and re-usable to push the cocktail stick in once you've started.
Mankinds first mistake; Questioning why those around him, are dying.
|
«
Return to Painting and Modelling Questions and Answers
|
1 view|%1 views
| Free forum by Nabble | Edit this page |

