HQ Foam Insert
|
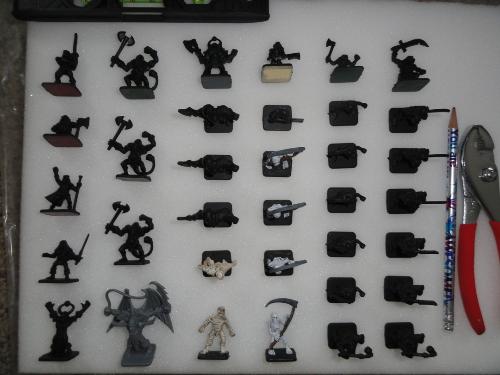
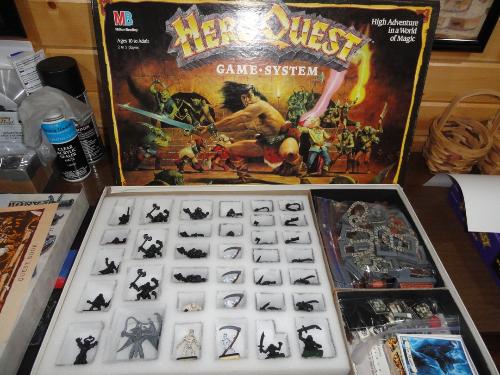
I was thinking of how to protect my minis and the convenient/store bought foam for them seemed a bit pricey... so I have decided to attempt my first foam cutout to protect my minis and below are some pictures of my process.
I started off with a 22"x22"x2" piece of foam for ~$10 from a local hobby store and laid out the minis according to the dimensions of my HQ weapon chart (~11"x13.5"). Once the minis were laid out and fitting within the dimensions I cut out the block (I was able to get at least 1 of each unique mini face up to help display the eventual paint jobs).  At this time I marked off the smaller boxes around each mini needing cut down (face up minis)/out (upright minis). For the face up minis I cut down about 1" (depth of my exacto blade) all around the mark made for the mini and then depressed the outside of the cuts so that I could cut off the center with scissors. I then did a small diagonal cut where the bases would go so the mini would lay flat. For the standing upright minis I cut all the way through the foam and then used the scissors to cut a small section (~1/4") from the bottom of the piece removed. I put this small piece back into the hole I just made and then made sure the mini for that spot wouldn't stick out of the hole (some of these pieces needed trimmed down still to fit the mini just right). Once all of my cuts were done and the minis were not sticking above the foam I then glued on some card stock behind the foam to help support it. This also helps to hold in the small pieces of foam I put back in the holes. Below is my completed foam with the minis in place.  Overall the card stock support doesn't need to be hefty strong since its mostly kept inside the box as seen below. It ended up fitting nicely in behind the weapon chart and the original box lid can still close over the game (though it does push up ~1/4" due to the fluffy 2" height of the foam).  The best part is from the $10 foam I still have enough to do my Kellar's Keep and return of the Witch Lord expansions with about another 11"x13" piece left over to work in my DarkWorld minis. Materials used for project; Foam Tape Measure Straight Edge Utility Knife Exacto Blade Scissors Card Stock Glue Final thoughts: My next foam purchase may end up being 2 pieces of 1" thick so I don't have to cut all the way through just to glue on a backing to support it later. I figure i can cut all the way through one piece and then 1/2 - 3/4s through the other ending with the two foam pieces glued together supporting themselves. |
|
Administrator
|
Nice work!
-----------------------------------
~The ravings of a single mad Goblin is bad enough, but such a power-hungry, malice-filled creature as Mortis can never hope to be understood~ |
|
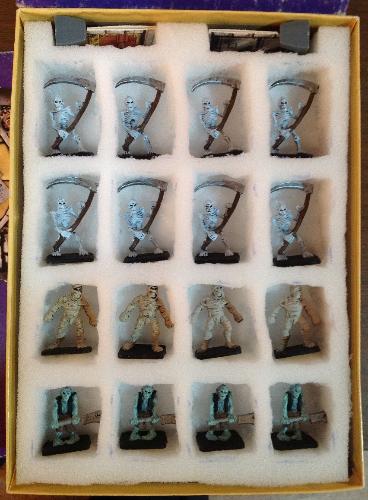
Well I finished up my Return of the Witch Lord expansion box foam. I made slots for the two doors and the rest sits nicely on top of the foam and allows the lid to close.
 I also worked on my zombies over the weekend and have decided I need to replace my main brush already. The bristles just do not seem to give me the accuracy/coverage I used to get on my DarkWorld minis. |
|
That's pretty neat! I've been thinking about a way to make some foam trays for my own box as well. I have a custom made wooden box, that holds my HQ stuff along with some other minis and boards, but right now, I just place my minis in without anything holding them in place, so they tend to shuffle around. This is a good idea ^^
Eager HeroQuest newbie since july 2011 :D
Check my Custom EU format card sets! Ye Olde Inn | HeroQuest blog with lots of usefull stuff |
«
Return to Other Gaming Accessories
|
1 view|%1 views
| Free forum by Nabble | Edit this page |

